

Contents
Introduction
Some helicopters fly beautifully without any flight control automation or stabilisation systems. The Gazelle was one such aircraft and a reasonably competent pilot could achieve amazing accuracy in IMC with just basic instruments. However, in this modern age, automation has become the norm and in many operations, being coupled up to an autopilot is the default setting when IFR. But all autopilots are not created equal.
In basic terms there are two levels of autopilot and stabilisation on helicopters:
- A 3-axis system where cyclic (pitch and roll) and yaw pedals feature some level of stabilisation and automation (occasionally called a 2-cue system as usually only pitch and roll are shown as “input cues” to the pilot)
- A 4-axis system where collective stabilisation and control (again occasionally called a 3-cue system as the collective channel gets an input cue too)
I started my aviation career on a 4-axis aircraft but latterly I have flown a mix of 3-axis and 4-axis aircraft. Lessons I have learnt during my career and trends I have noted during instructing, have given me a set of core principles I now use in instructing on 3-axis autopilots across several types.

The 3-axis autopilot
For the purposes of this discussion I am going to assume you understand how stabilisation (SAS/SCAS) and attitude hold (ATT) work and how series and parallel actuators function. I am going to focus on the upper modes of an autopilot. I will look at those basic modes in another blog.

The foundation for an autopilot is the attitude hold. With this solid basis, the autopilot can use data from sensors and systems to manipulate the attitude hold through the actuators to achieve the higher level or upper modes.
Levels of automation
The modes provided by the autopilot can be broken down into several “levels” of progressively more sophistication:
- Basic modes – these modes capture and hold a specific parameter. Sometimes the autopilot provides a mean to pre-select and/or adjust the datums these modes use. Examples include:
- Speed hold – capture of indicated airspeed
- Altitude hold – capture of barometric altitude
- Heading hold – capture of heading
- Vertical speed hold – capture of a rate of descent or climb
- GNSS assisted modes – these modes are refinements of the basic modes to include some GPS data to be more useful. Examples include:
- Track hold – capture of track
- Flight path angle – capture of flight path angle (eg 2 degree descent path)
- Advanced navigation modes – these modes build on the basic holds to provide capture of various steering data in the horizontal and vertical planes. Examples include:
- Flight Management System (FMS) navigation – capturing and following an FMS defined route laterally
- VOR navigation – capturing and following a specific VOR radial
- Altitude change – automated climb to a new altitude
- Low speed modes – these modes allow automation of low speed tasks like hovering or maintaining position with a moving target. For example:
- Hover hold – maintain a specific ground position
- Groundspeed hold – maintain a specific rate of speed across the ground
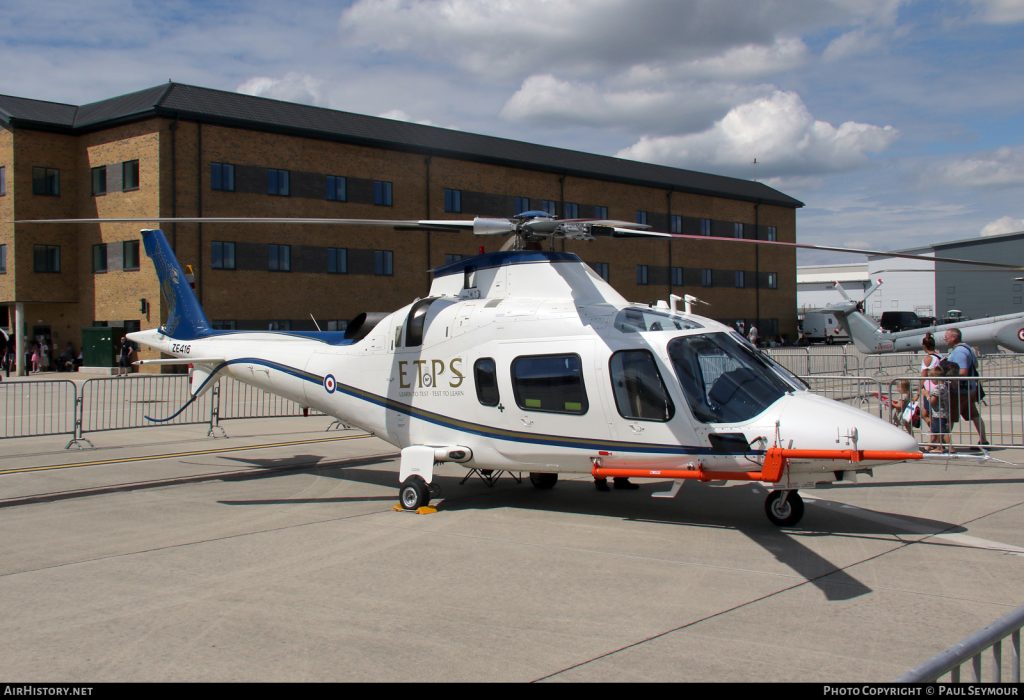
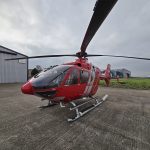
Practical example – Airbus H145
An example of how modes might be grouped in terms of layers is shown below:

This is by no means an exhaustive list but it is important to focus in on how the system automates certain modes.
- Lateral modes – Pretty much all lateral and navigation modes use lateral cyclic and/or yaw pedals to control the aircraft. This does not change dramatically between 4-axis and 3-axis autopilot systems and generally they are quickly understood for pilots new to autopilots or pilots moving between types.
- Low speed modes – In the hover, forward backwards is always in cyclic pitch, lateral movements are in cyclic roll and heading through the yaw pedals. Up and down in the hover is through the collective, whether 4-axis or 3-axis (obviously not coupled in the case of 3-axis).
Choosing the right mode for pitch channel
So what does that leave? Just the airspeed and the vertical modes. On a 3-axis autopilot system, these modes are achieved through the cyclic pitch channel.
Only one mode can generally be engaged at at time in each channel. Therefore, for the cyclic pitch axis you can have either airspeed mode or altitude mode or vertical speed mode. This provides the pilot with a choice and a need to determine priorities. Is it more important to maintain altitude or airspeed or vertical speed? The really critical thing that’s left is “What does the collective control?”
Cruise

In the cruise phase, the priority is to maintain altitude. Accurate altitude control is a fundamental part of avoiding other traffic and avoidance of terrain. Thus in the cruise is often best to put an ALT hold in the cyclic pitch axis. The collective now controls speed. The collective axis can have some friction applied and speed is therefore maintained.
Airspeed is usually maintained for long periods in the cruise and so only infrequent small changes are needed on collective. This is particularly helpful on some aircraft (notably the A109E) where every collective input leads to small disturbances in the other axes. Speed hold could be put in the pitch channel but this adds a higher workload to the pilot since they have to closely monitor the altitude and make frequent small changes in collective to hold it.
Therefore typically the best choice in pitch for cruise is altitude hold. The pilot controls speed with the collective.
Climbs and descents

In climbs or descents, the mode used in pitch depends on the level of sophistication of the autopilot. On EC135 for example, there is an altitude change mode (Altitude Acquire (ALT.A)) which uses vertical speed to change altitude. For any change other than small “beeper trim” changes, the ALT.A mode is used (which itself is based on vertical speed).
The pilot needs to control the airspeed with collective. Dependent on pilot attention this can lead to some large speed variations on the initiation and conclusion of the climb or descent. Most critically, if a pilot does not pay attention in the automated level off from a descent , the collective power setting will not be sufficient to maintain speed and as the aircraft levels off using pitch, the airspeed will fade away.
Typical Climb and Descent Mode Errors
A typical error at this point is when a pilot focusses elsewhere at this stage and only notices the speed washing off when 10-20 kts have been lost (or 30-40 kts in some more extreme cases). The recovery can take a protracted amount of time and effort. This can upset a subsequent approach or lead to total loss of control.
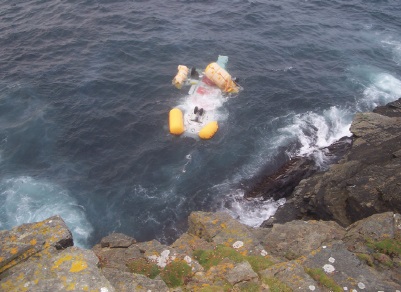
Of note, the fatal ditching G-WNSB on approach to Sumburgh was due to a crew using a 3-axis autopilot mode in a descent and not adequately monitoring speed. Read more here.
Using IAS for climbs and descents
On some other platforms it might be more natural to switch to airspeed mode and control rate of ascent or descent manually with collective. This may be combined with something similar to ALT.A. On Bell 429 for example, the pilot can combine the altitude change mode (Altitude Select (ALT S)) with either vertical speed or airspeed. There is still of course the risk of a poorly monitored level off phase as the ALT S with IAS becomes IAS – the pilot goes from controlling rate of climb to controlling speed with similar results. This combination of ALT.S and IAS is not very common however.
Therefore typically the best choice in pitch for climbs and descents is altitude change mode combined with vertical speed. The pilot controls speed with the collective.
Approaches

3D approaches
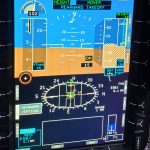
On most helicopters with a 3-axis autopilot, there is some form of approach mode for 3D approaches. In the pitch channel, the autopilot can capture a glideslope (either ILS or GNSS derived); speed control remains with the pilot on collective.
Alternatively the pilot can replace the glideslope mode with airspeed and manually fly the glideslope. Speed says constant but the pilot must make frequent small adjustments in collective. This is a relatively high workload task compared to letting the autopilot do the glideslope.
Left HAND CHANGING MODE
When setting up for an approach, the autopilot will typically be in cruise configuration (see above – using ALT mode) and therefore altitude will be in the pitch channel. On initiating the approach, the pitch channel will need to be changed (which may be automatic). This is always done before the collective is adjusted. Pitch mode before collective – remember that. The collective will always need to adjusted too, leading to this being high workload in all situations (mode change then collective change in quick succession).
Therefore typically, the best choice in pitch for 3D approaches is the glideslope element of the approach mode. The pilot controls speed with the collective.
Unplanned nose dive?
However, there may be more to it than that. With a fully coupled 3D approach, the glideslope capture is controlled by pitch as we have already seen. The pilot needs to be prompt in applying “Pitch Mode -> Power” at the commencement of the descent if operating some aircraft. The AW109E has a gear speed limit of 120 kt which can easily be exceeded by the unwary pilot at the start of an approach (or indeed any coupled descent). The only solution is to know your aircraft and anticipate errors using TEM as required. Thank you to a fellow Test Pilot for reminding me of that topic!
2D approaches
For 2D approaches the situation is more complex and depends on how the 2D approach is flown. There are typically 2 options: a step down approach to a level off up to Missed Approach Point or a Continuous Descent Final Approach (CDFA) to a Decision Altitude.
For the step down option, an altitude capture mode such as ALT.A offers some advantages; primarily it will automatically level off. The pilot controls speed with collective. However, adjusting the altitude based on the distance/altitude cross check table is relatively difficult to co-ordinate (requiring both collective and an autopilot datum change in vertical speed). The mode which actually achieves ALT.A is often Vertical Speed (VS) mode. A failure to monitor airspeed when in this mode can be fatal – see earlier.
Alternatively using airspeed mode in pitch offers precise manual control of rate of descent which allows refinement of glidepath against the table of distance/altitude. The workload is generally lower and it simplifies the go around (more on that later)
For CDFA approaches (with or without an advisory glideslope) it is often better to use an airspeed hold and maintain a nominal rate of descent by adjusting the collective setting. It leads to a smooth approach and again allows for a simpler go around.
Therefore, typically, the best choice in pitch for 2D approaches is the airspeed mode. The pilots controls rate of descent with the collective.
Go-arounds

A critical scenario to consider is the go-around from a coupled instrument approach. This is probably the most demanding manoeuvre for a 3-axis autopilot and there are several ways to achieve a go-around from a coupled approach. An error here can lead to loss of control (I have seen this several times in a simulator with pilots who are new to 3-axis operation!). Unfortunately as the CAA/EASA proficiency check always requires a manual ILS, some crews have never actually done a coupled ILS! (TRE doing OPC take note!).

Many 3-axis autopilot helicopters offer a go-around mode. Typically it will maintain a heading or roll attitude and command a pitch to achieve a set rate of climb. The pilot controls airspeed through collective. This is the most unnatural control input in any scenario – the pilot wants to go-around and climb but their focus is on speed control! In my experience, this can go very wrong.
Autopilot choices for the go-around
However, there are actually 4 major strategies for the use of the autopilot for the go-around:
- Use the go-around mode. This can be confusing as described above. It can also be dangerous – the EC135 maintains the roll attitude on engagement which may not be wings level! The rate of climb used by the mode may be significantly less than the actual capability of the aircraft to climb. The pilot controls airspeed with collective.
- Use airspeed mode. If airspeed mode is engaged just prior to the go-around, the go-around itself is simply a case of selecting the appropriate power for the desired rate of climb. The pilot controls rate of climb with collective.
- Revert to manual flying. Decoupling from the coupled approach mode and reverting to attitude hold, allows the pilot to pull power to achieve a high rate of climb, but may require significant co-ordination of cyclic/yaw to maintain lateral navigation; typically insufficient yaw is applied and the aircraft drifts. The pilot controls rate of climb with collective. This may be against company procedure
- Use vertical speed/altitude change mode. Using vertical speed/altitude change mode is very similar to using the go-around mode. Unless pre-selection of a desired vertical speed is possible this may not yield immediate results (particularly on Bell 429 which engages VS at the current rate of climb or descent). The default rate may also be quite slow (eg 500 fpm on EC135) The pilot controls airspeed with collective.
The choice from these 4 options is very personal. With practice, the provided go-around mode may be usable but I generally find it is very high workload on 3-axis systems. I much prefer to use airspeed mode which provides a consistent go-around for both 3D and 2D coupled approach go-arounds.
Pitch mode -> Power
Again, it is interesting to note that in every case, the pitch mode is changed, then the collective setting is changed for the go-around. Never the other way around. I will revisit this issue later.
In conclusion, the pitch mode used for go-arounds can be one of several options. The pilot controlling either airspeed or rate of climb on collective.
Manual flying
The final scenario to consider is manual flying. This may be reached through choice (see go-arounds above), through training/checking need (the dreaded manual ILS) or through system failure (the “Degraded Reliability of AFCS Data” emergency on EC135 for example).
This is worthy of discussion here because of how a reversion to manual can suddenly change what the collective controls. Imagine flying in the cruise with HDG and ALT selected. The pilot is controlling airspeed with collective. If the upper modes are suddenly removed, the pilot is now controlling altitude with collective. The left hand needs to change role. This is also particularly relevant if reversion to manual control occurs during a coupled 3D approach.
The pilot controls altitude with collective in manual flying.
3-axis operating principles
After that canter through the use of modes in 3-axis flight, we can reach some conclusions:
- Except for the approach and go-around phase, the pilot generally controls airspeed with collective.
- In 2D approaches, some go-arounds and manual flying the pilot will be controlling altitude with collective.
- The pitch mode is always changed before the collective is adjusted when changing modes.
- The highest workload occurs when an automated altitude or rate of climb/descent occurs (initiating a descent/approach, levelling off or a go-around).
From these 4 points, we can come up with some general principles:
- When ever a pitch mode is changed, think about what your left hand controls. The following procedure can be helpful in formalising any change in the autopilot modes – SEMA:
- Setup – setup any datums for new modes (eg HDG, ALT.A)
- Engage – engage the mode using the approach switch or button
- Monitor – monitor on the primary flight display and what the aircraft is doing
- Adjust power – what does my left hand now control and does it need an adjustment?
- It is always: PITCH MODE -> POWER and never the other way around
- Focus on flying the aircraft when an automated pitch mode occurs. In particular, do not start any other task until a level off is complete. Nail the airspeed trend to zero before looking away.
If it does all go wrong and you find yourself asking “What the &*£$! is it doing now?” then always step down through the levels of automation incrementally. See my article on the “Red Button of Doom” on EC135 for reasons why:
EC135, Checklists and the “Red Button of Doom”
Common errors
The following are common errors to avoid for pilots who are new to 3-axis operations:
- Not paying attention to airspeed when this is being controlled by collective
- Trying to control rate of climb or descent when collective is actually controlling speed. See the accident report on the G-WNSB https://www.gov.uk/aaib-reports/aircraft-accident-report-aar-1-2016-g-wnsb-23-august-2013
- Trying to use power before changing pitch mode during a coupled go-around
- Failing to use an appropriate amount of friction on collective, leading to sagging of the collective and loss of airspeed
- Not understanding what the go-around mode does
- Failing to practice coupled approaches to coupled go-around as the proficiency check always has a manually flown ILS
- Failing to monitor what the aircraft does in response to a mode change – think SEMA!
Check out my other articles:
- Helicopter Single Engine IFR – New horizons

- Making the grade – understanding climb gradients in the go around
- Unfair Skies: Restrictive helicopter instructor rules and how to fix them

- How to create an instrument rating instructor (IRI) – A helicopter anomaly

- The evolution of Category A Helipad procedures – A strong foundation for VTOL to learn from?
- Strips vs dials – Which is better?
- Under the weather – are UK HEMS weather rules broken?
- Mastery of the GTN 750 – Ten things you should know
- Checking anomalies – The weird requirements of helicopter proficiency checks
- It’s all about the switch – How helicopter designers need to think about the human in the cockpit
- Engine Failure Training Mode – A safety tool that will punish the unwary
- Automated take offs – Pointless or are they the new standard?

Leave a Reply